This guide will help you configure a Geonode proxy in the Dolphin Anty browser.
Prerequisites: Get Proxy Credentials from Geonode
Before setting up a proxy, first, retrieve your proxy credentials from the Geonode dashboard.- Follow this guide: How to Obtain Proxy Server Information
Steps: Setting Up a Proxy in Dolphin Anty
Follow these steps to configure a proxy in Dolphin Anty:Step 1: Install Dolphin Anty
- Go to the Dolphin Anty Download Page.
- Download the browser based on your operating system.
- Install the software and create an account.
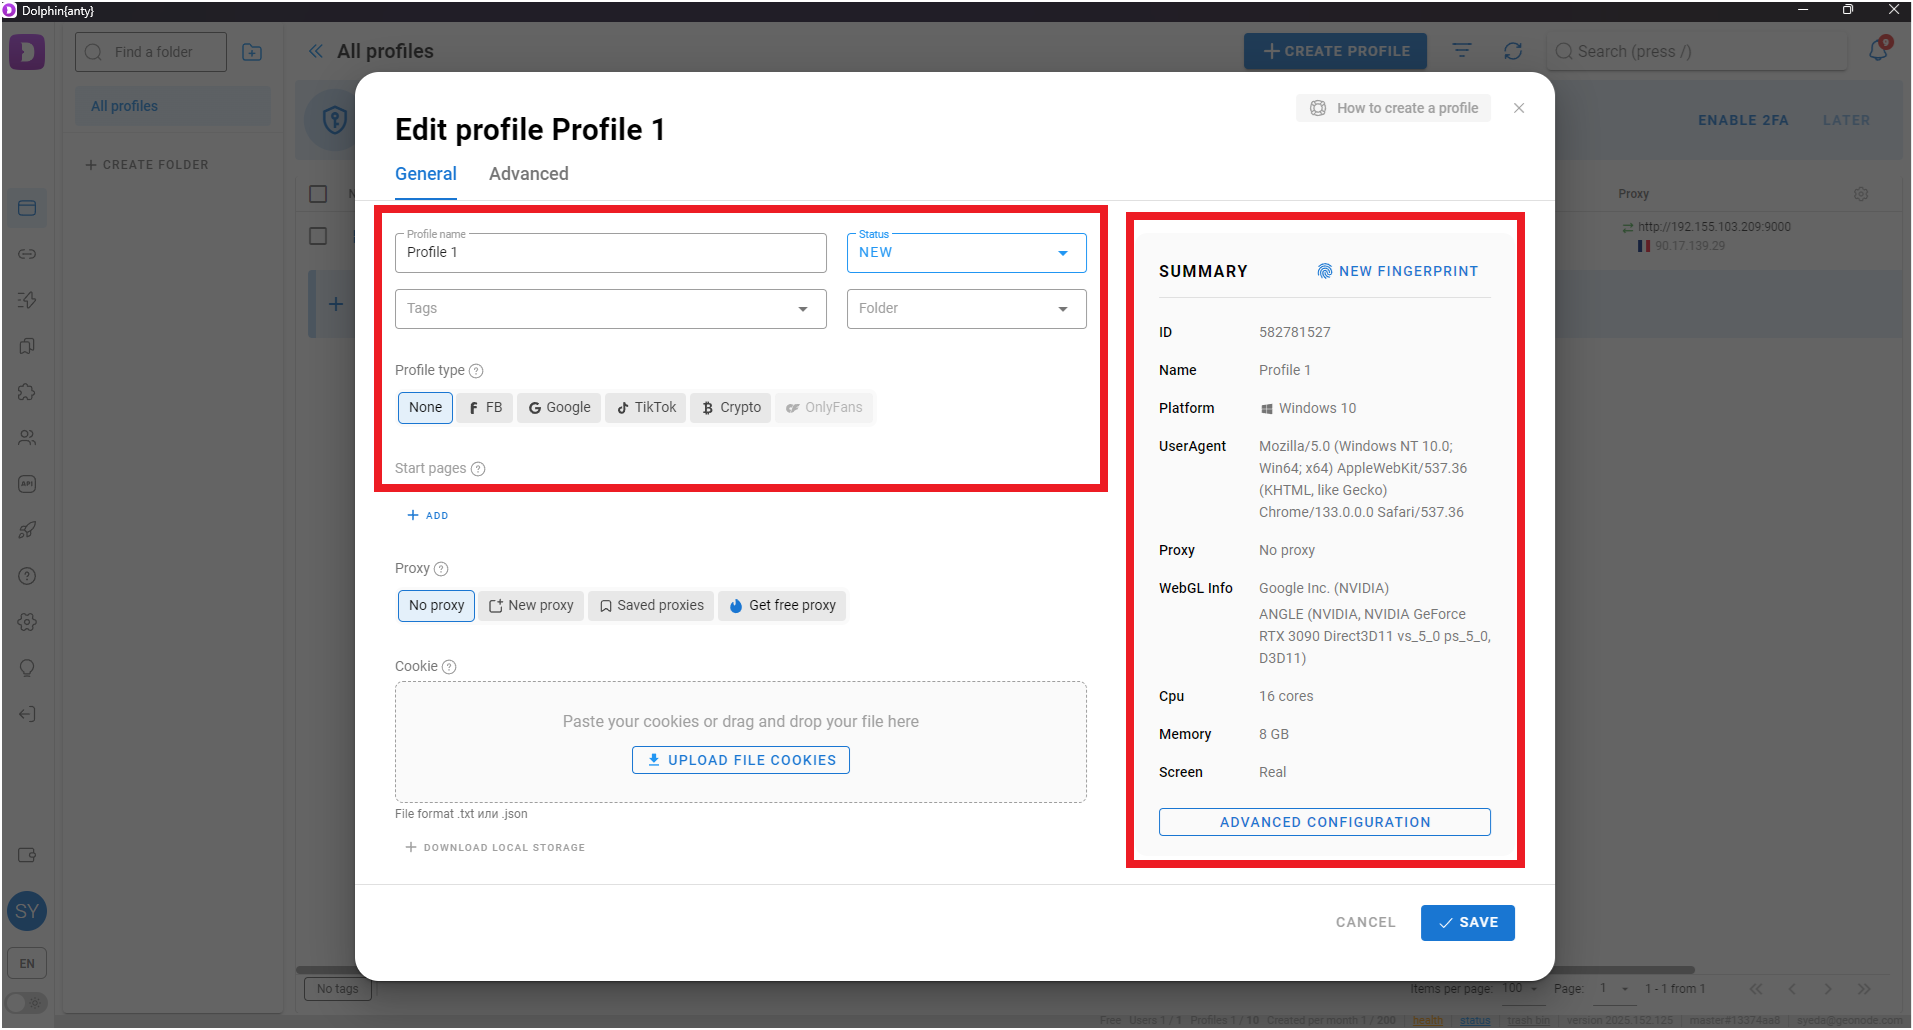
Step 2: Create a New Profile
-
Open Dolphin Anty and click the Add Profile button.

-
Enter the required details:
- Profile name
- Operating system
- You can randomize the fingerprint for additional security.
-
On the right side, review your browser details.
Step 3: Add a Proxy Details
- Click on proxy tab.
- Select a connection type (For this guide, we will use HTTP).
-
Enter your proxy details:
- Proxy (IP:Port)
- Username
- Password
-
Click on create profile
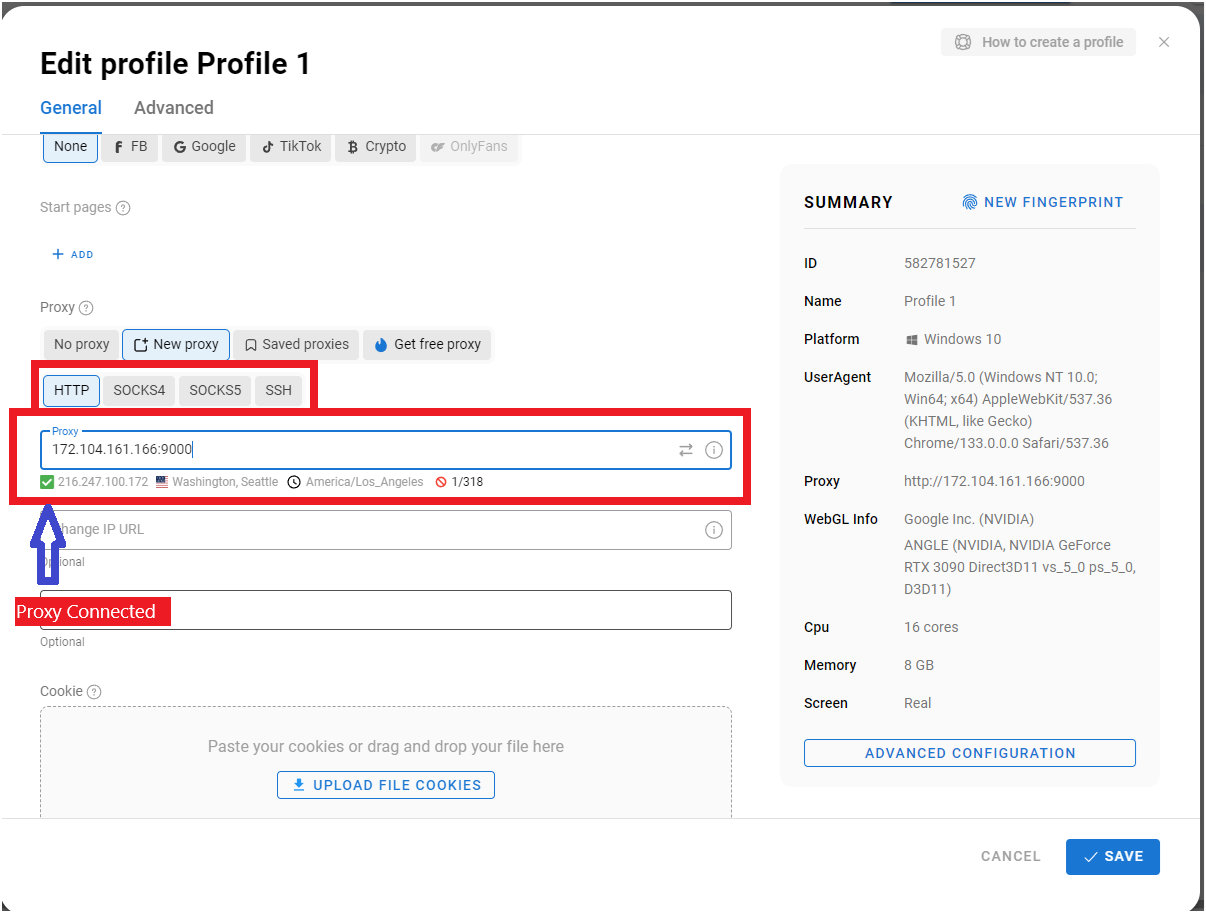
- The green tick shows proxy connected.
Step 4: Create and Launch the Profile
- Click the Create Profile button to save your settings.
-
Once created, you will see the profile listed.
- If the proxy shows a location, it means the proxy is active.

-
Click the Start button to launch the browser with your configured proxy.
- Go to
http://ip-api.com/jsonto check your IP

- Go to
If you encounter any issues, refer to the troubleshooting section or Geonode support.
FAQs
My proxy connection failed. What should I do?
My proxy connection failed. What should I do?
If your connection fails, check the following:
- Ensure that your proxy credentials (IP, Port, Username, Password) are correct.
- Verify that your proxy is active in the Geonode Dashboard.
- Try another proxy format if the selected one isn’t working.
- Refer to this guide for troubleshooting: Troubleshooting Proxy Connection Issues
Why is my IP address not changing?
Why is my IP address not changing?
- You may be using a Sticky Session proxy that keeps the same IP for a certain duration.
- If using a Rotating Session, verify that your requests are being routed through the proxy correctly.
- Check your connection using an IP verification tool: Verify Proxy Connection
Why am I getting a CAPTCHA while browsing?
Why am I getting a CAPTCHA while browsing?
- Some websites detect frequent IP changes and show CAPTCHAs as a security measure.
- Use Sticky Sessions if you need a stable connection.
- Try switching to a mobile or residential proxy for lower detection rates.
My proxy is working, but the internet is slow. What should I do?
My proxy is working, but the internet is slow. What should I do?
- High latency can occur if the proxy server is far from your location.
- Try using a different proxy region to improve speed.
- Reduce the number of simultaneous requests to avoid overloading the proxy.
Why am I getting the authentication prompt repeatedly?
Why am I getting the authentication prompt repeatedly?
- This can happen if the proxy authentication credentials are not correctly stored or passed by your browser or application. Ensure that the correct username and password are saved in your proxy settings.
- Or you can whitelist your IP. Refer to this guide for How to Whitelist an IP