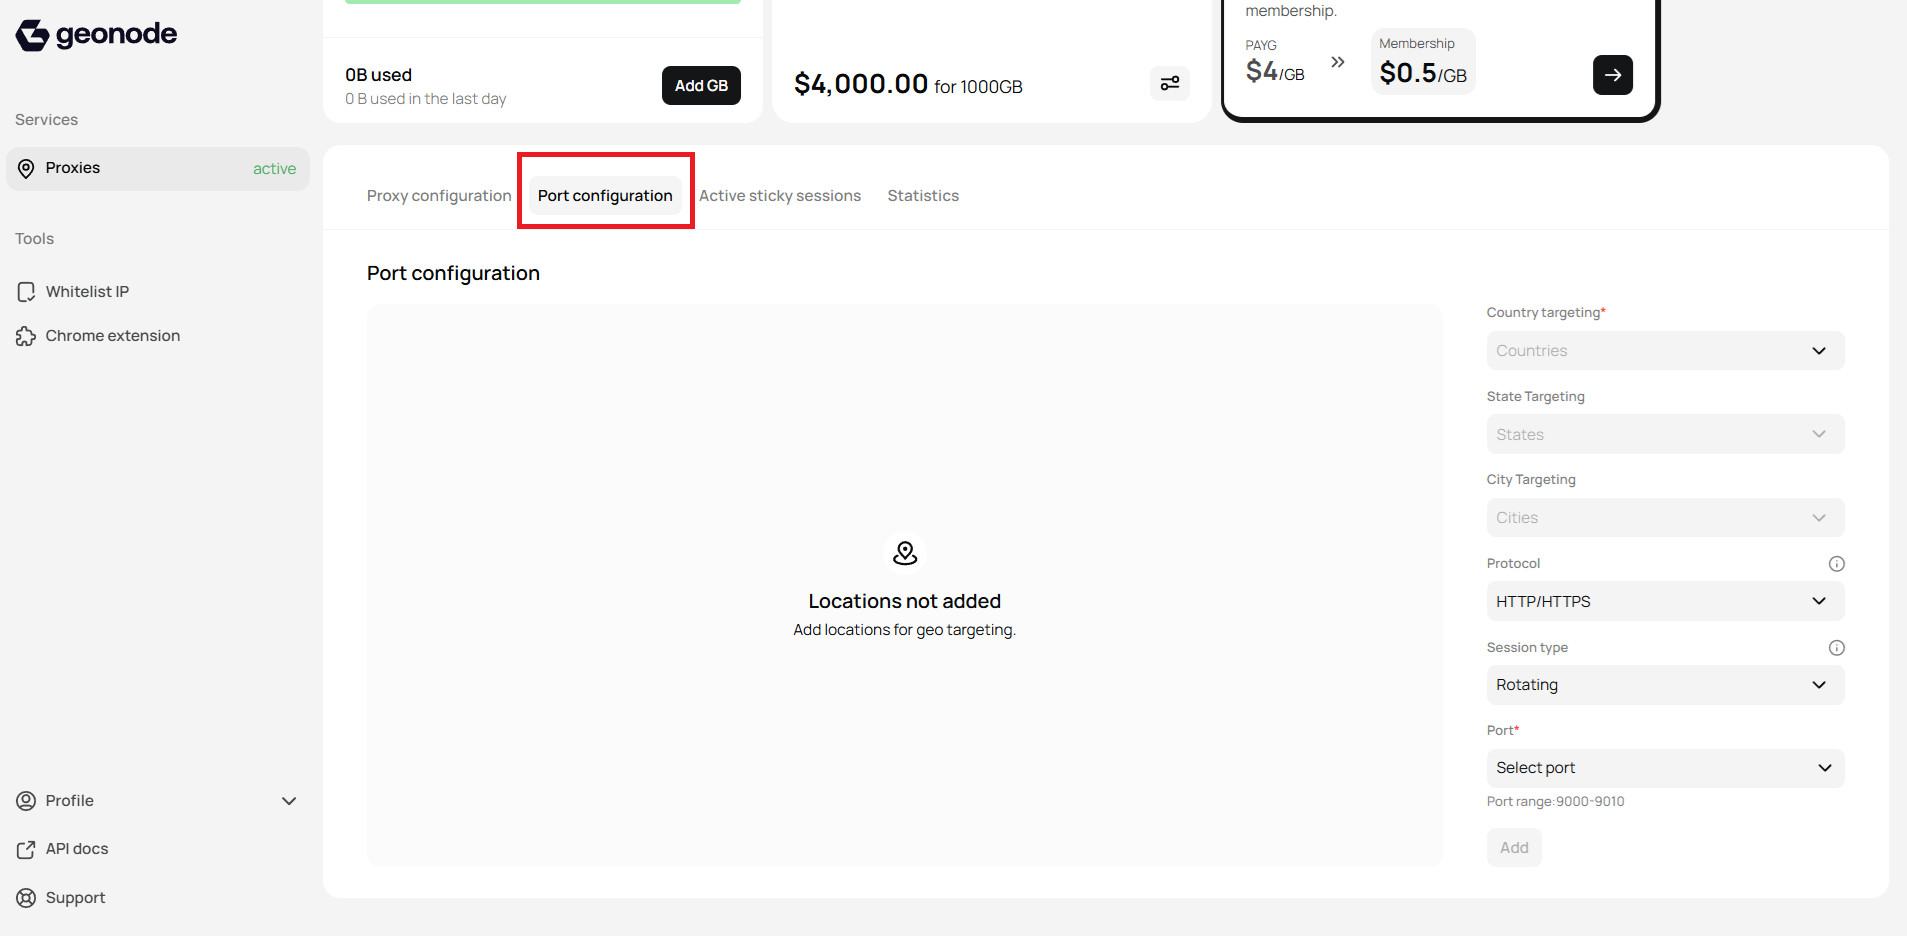
The Port Configuration section in the Geonode dashboard allows you to set up and manage proxy ports with specific targeting options. This guide will help you understand how to configure ports effectively.
Step 1: Navigate to Port Configuration
- Log in to your Geonode dashboard.
- Click on the “Port Configuration” tab at the top navigation bar.
Step 2: Configure Your Port Settings
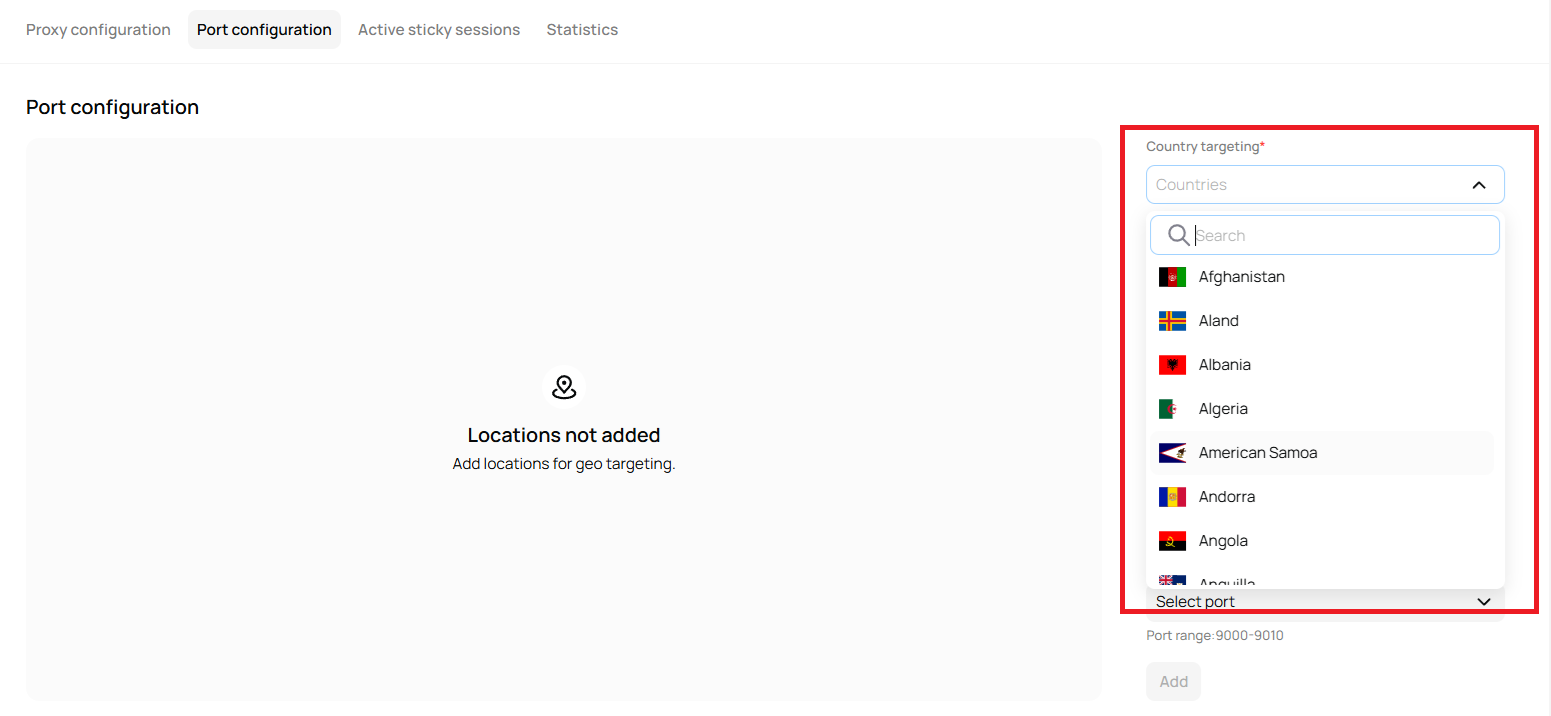
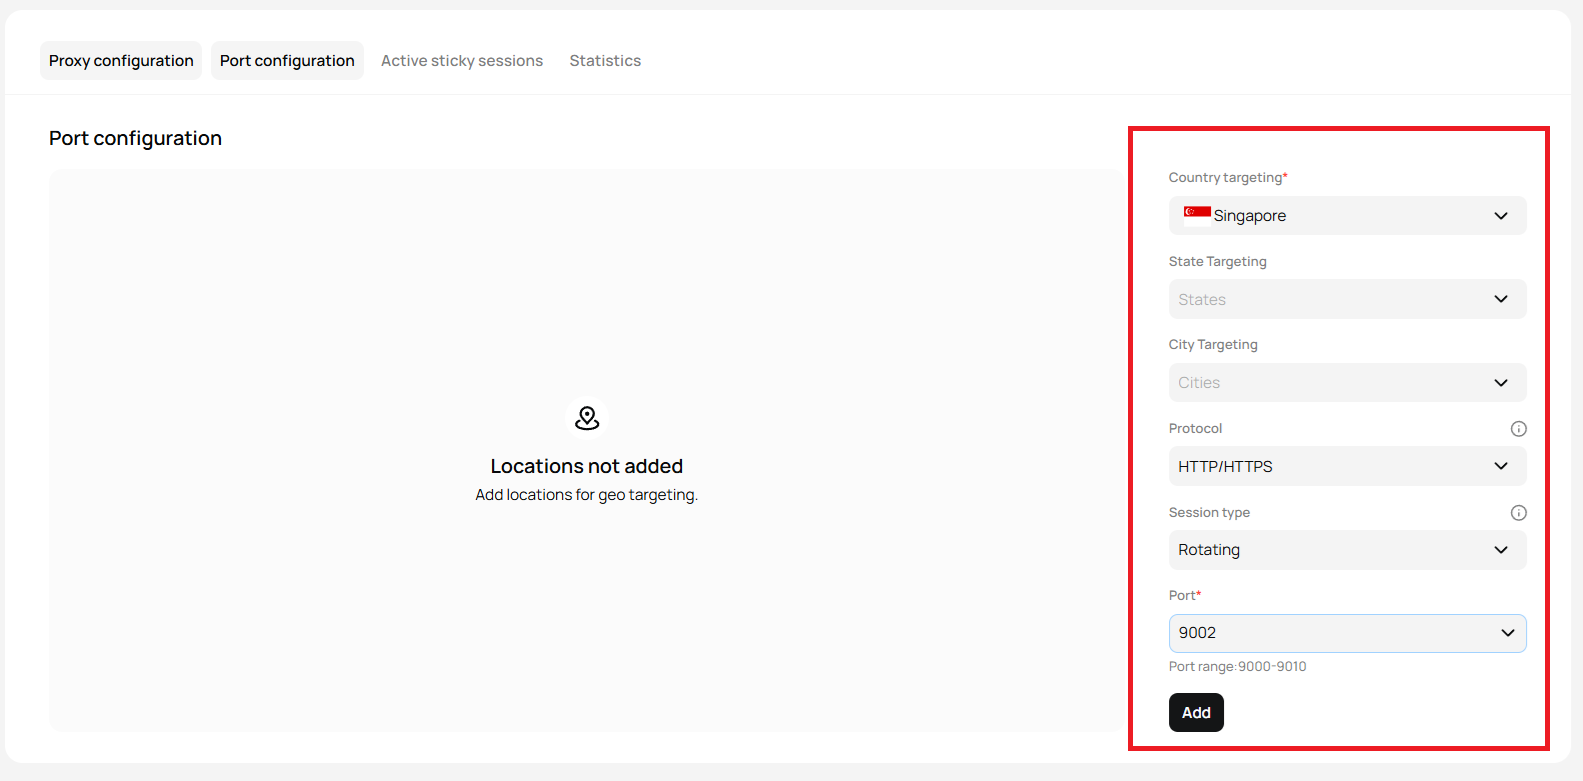
1. Country Targeting (Required)
- Click on the “Countries” dropdown.
- Select the country you want to target.
- This is a mandatory field for geo-targeting.
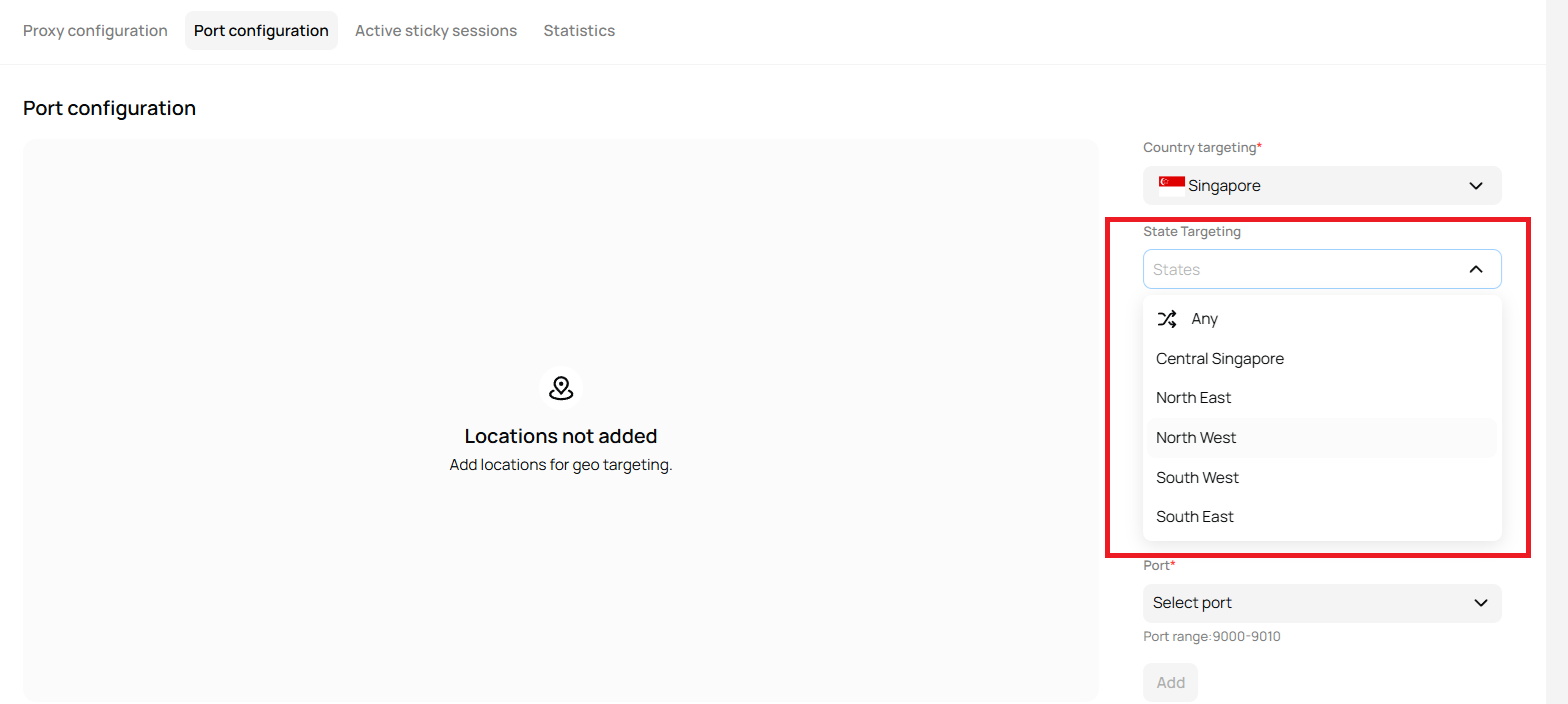
2. State Targeting (Optional)
- After selecting a country, the “States” dropdown becomes active.
- Select a specific state if needed.
3. City Targeting (Optional)
- After choosing a state, the “Cities” dropdown will be enabled.
- Select a city for more precise targeting.
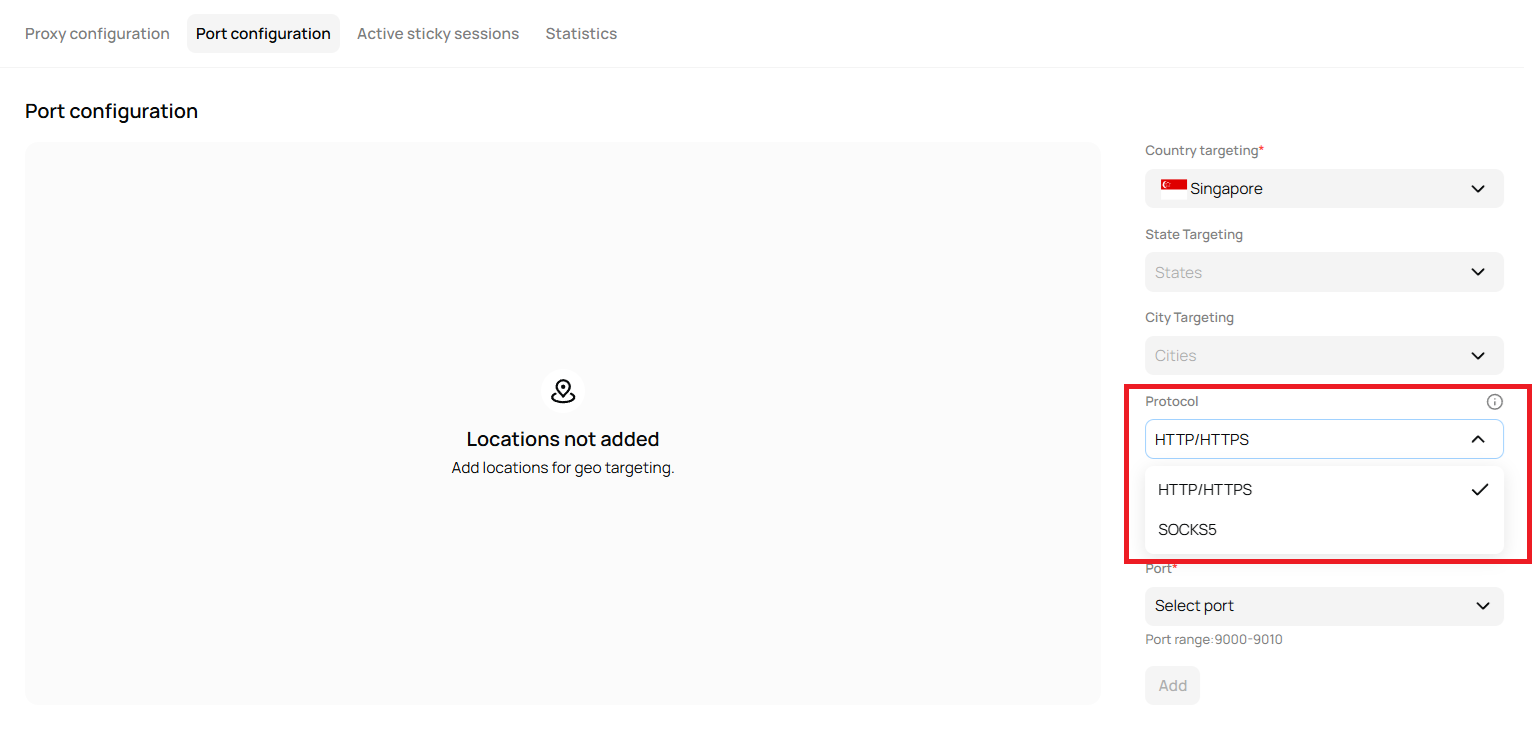
4. Protocol Selection
- Click on the “HTTP/HTTPS” dropdown.
- Choose between available protocols:
- HTTP/HTTPS for standard web traffic.
- SOCKS5 if supported, for more secure or versatile connections.
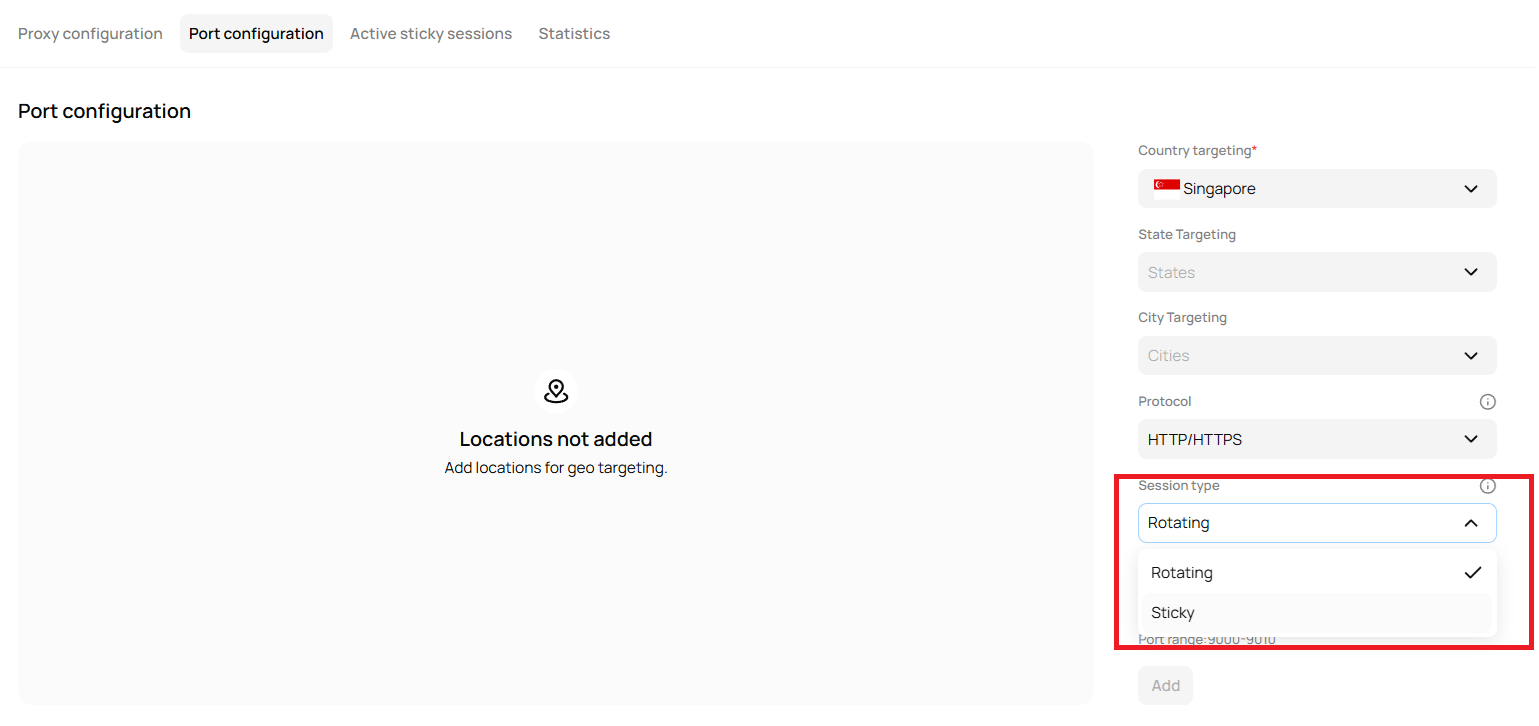
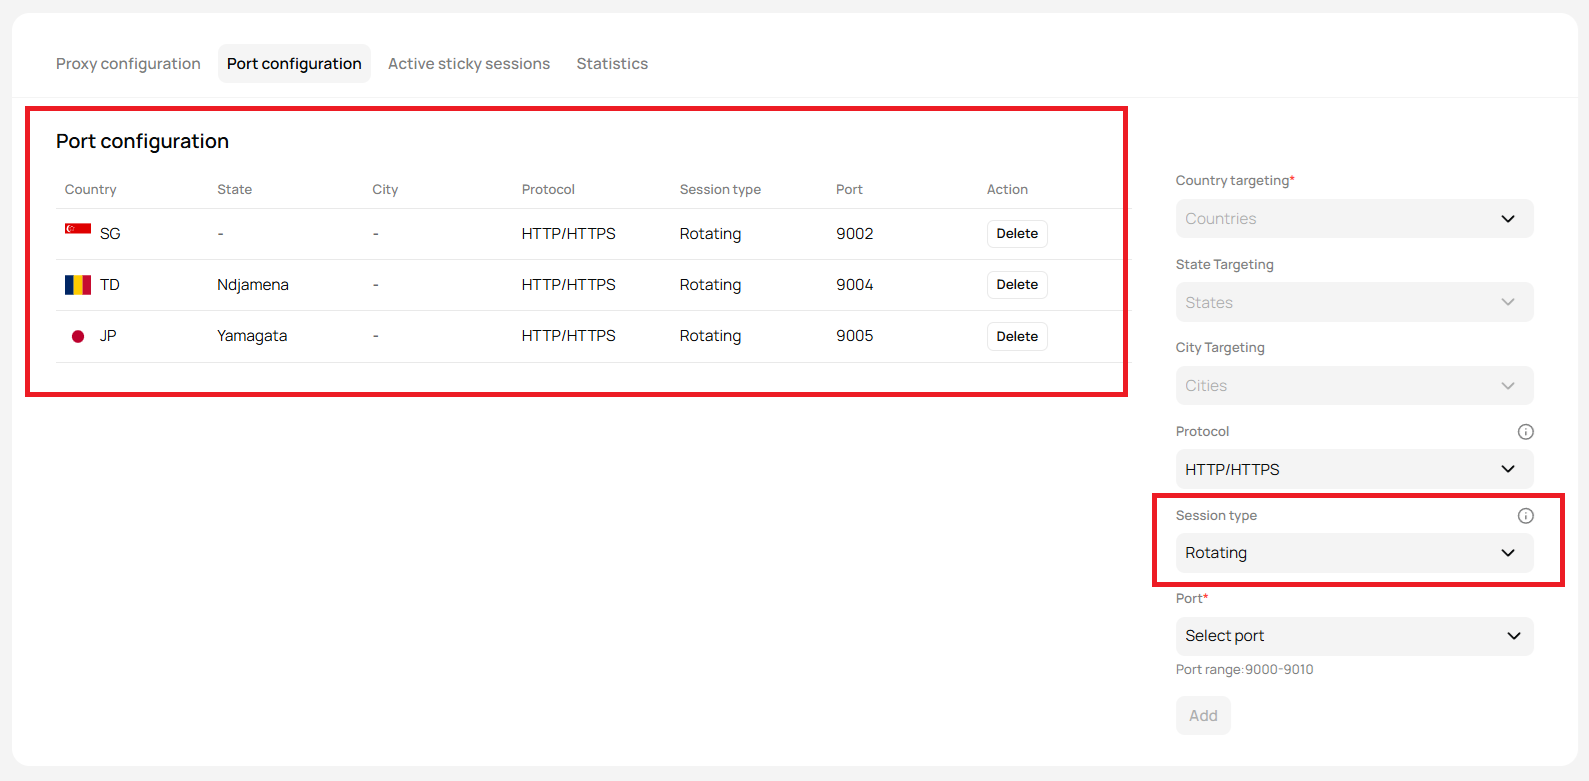
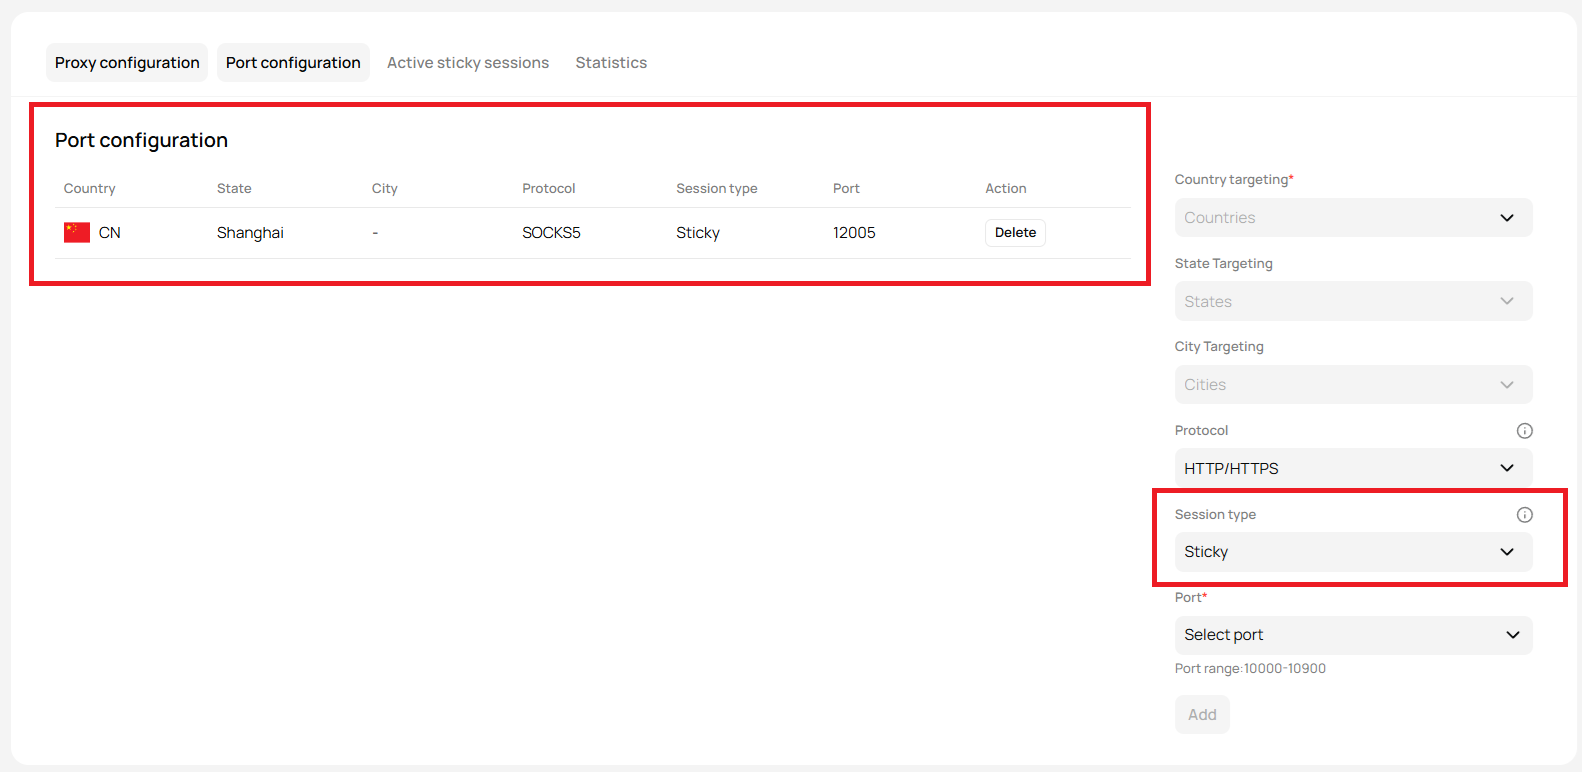
5. Session Type
- Select the session type from the dropdown:
- Rotating: Changes IPs periodically, useful for scraping and automation.
- Sticky: Maintains the same IP for a session, ideal for login-related tasks.
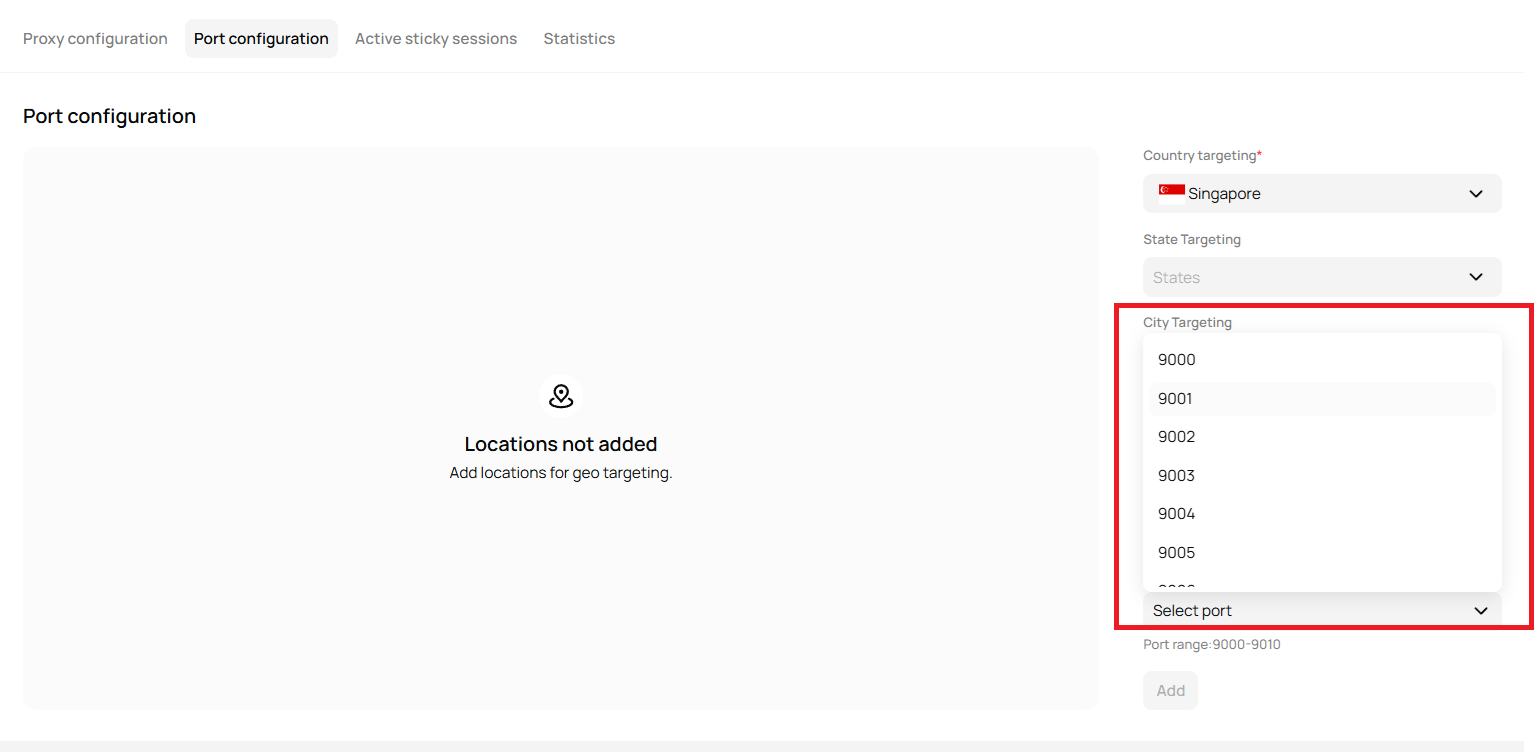
6. Port Selection (Required)
- Click on “Select Port” to choose a port from the range based on your configure Protocol and session type.
- This is a required field to complete the configuration.
Step 3: Add the Configuration
- After filling in the required fields, the “Add” button will become active.
- Click “Add” to save the port configuration.
Step 4: Review Added Locations
- Once added, the configured ports and locations will be displayed in the central section.
- You can view, edit, or delete configurations as needed.
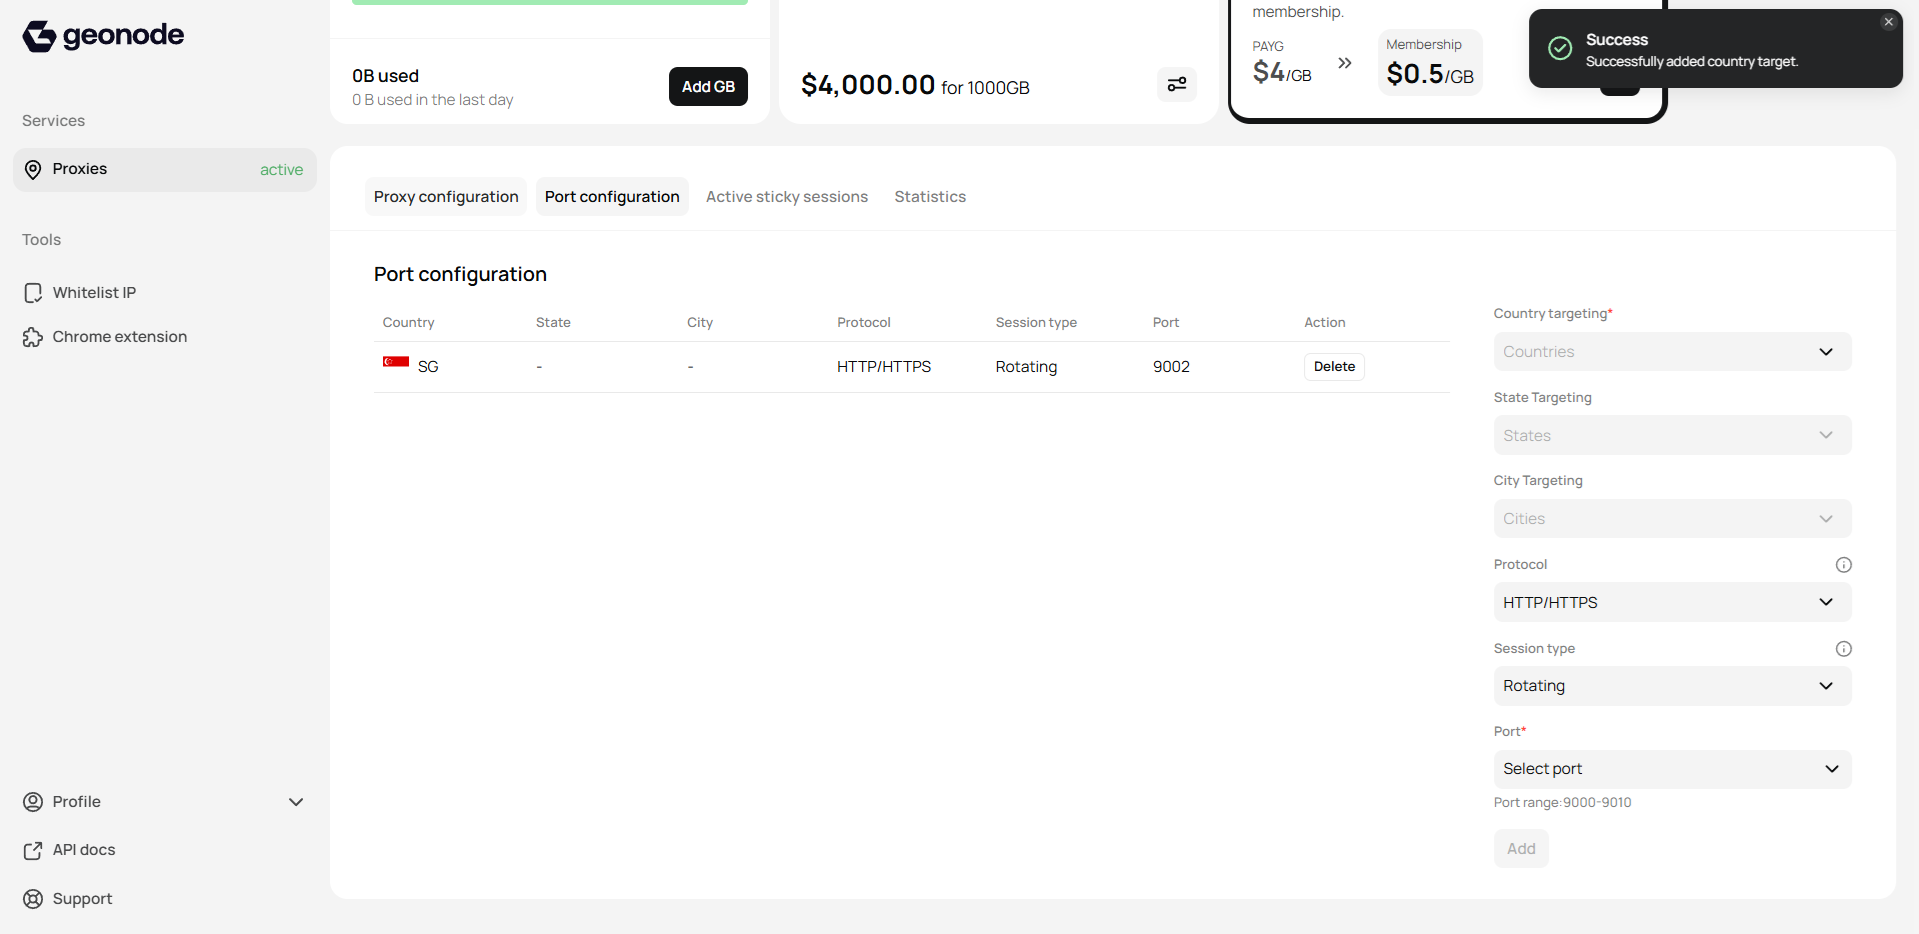
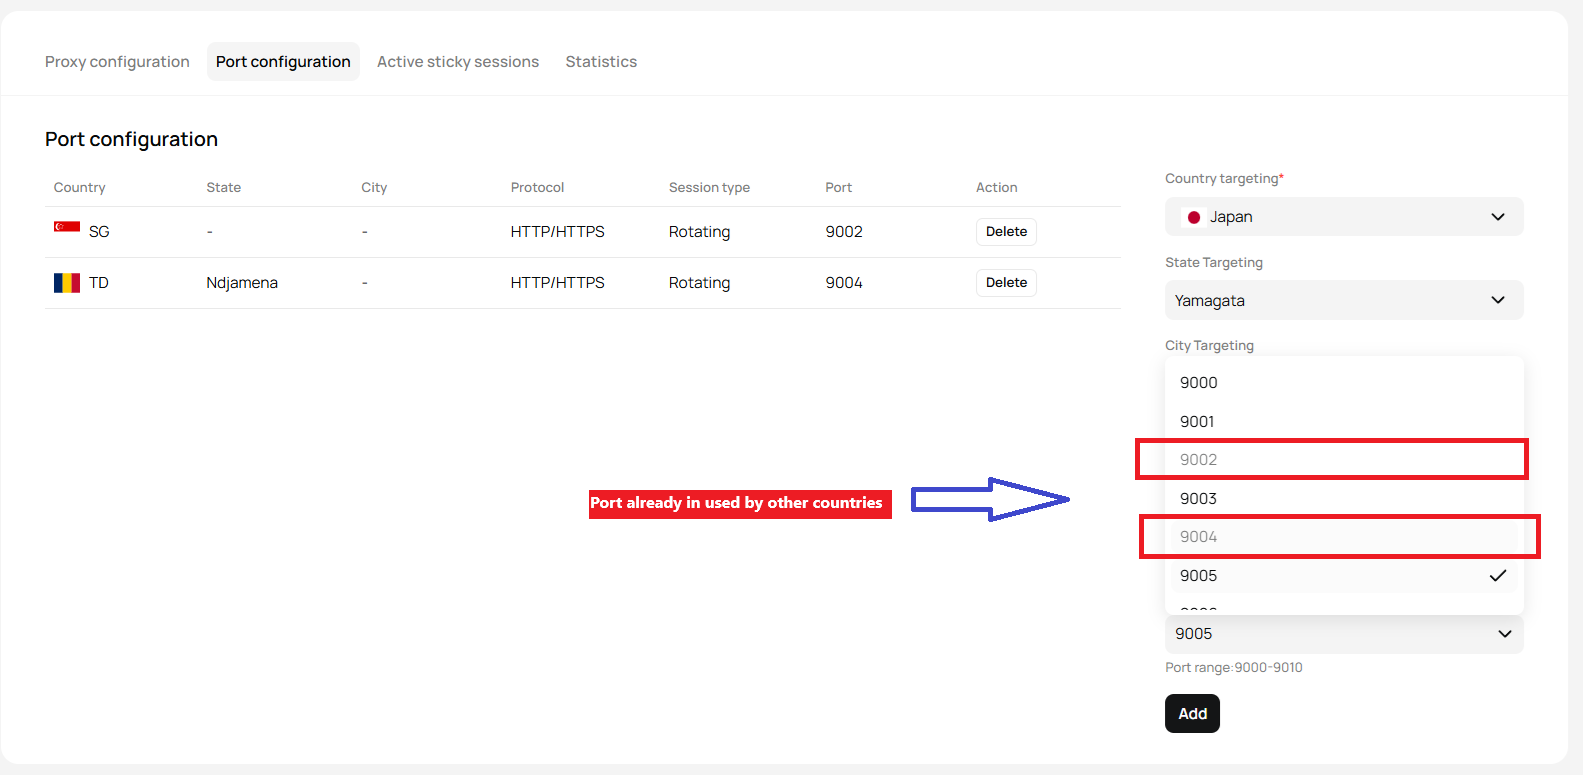
Port in Use
- Once added, the configured ports and locations will have that port and can’t be used by any other country.
Final Result
You’re now ready to manage your ports efficiently using Geonode’s Port Configuration feature!-
For Rotating:
-
For Sticky:
Troubleshooting Tips
- Add button is disabled: Ensure all required fields (Country and Port) are selected.
- Cannot select State/City: These options only become active after selecting a country.
- Connection issues: Double-check your protocol and session type settings.
FAQs
Why is the 'Add' button disabled?
Why is the 'Add' button disabled?
Can I use the same port for multiple countries?
Can I use the same port for multiple countries?
No, once a port is assigned to a specific country, it cannot be used for another country. You need to select a different port for each configuration.
What happens if I select 'Rotating' session type?
What happens if I select 'Rotating' session type?
With the “Rotating” session type, your IP address will change periodically, making it ideal for tasks like web scraping or automation.
Can I switch between HTTP and SOCKS5 protocols?
Can I switch between HTTP and SOCKS5 protocols?
Yes, you can select the protocol from the dropdown during configuration. However, SOCKS5 support depends on your plan and use case.
Why can't I select a state or city?
Why can't I select a state or city?
State and city targeting only become available after selecting a country. If they remain disabled, check if a country has been selected first.